
You convert a JPG to PNG, open it on a coloured page, and the white box is still there. Nothing went wrong. Changing the format and removing the background are two different jobs, and most converters only do the first one. There are two ways to get a real transparent PNG. I tested both, including a case where the quick method failed.
Why converting doesn't remove the background
Every pixel in a JPG has three values: red, green and blue. A PNG can have a fourth one, alpha, which says how see-through the pixel is. When you convert a JPG, there's no alpha to copy, so every pixel is set to fully solid. The white background is just white pixels, as solid as the rest of the picture.
To make it transparent, something has to decide which pixels are background and set their alpha to zero. There are two ways to make that decision: by colour, or by what's in the picture.
Method 1: remove a colour (fast, private, plain backgrounds only)
The JPG to PNG converter has a switch called "Make a background color transparent". You pick the background colour, and every pixel close to it becomes transparent. A tolerance slider sets how close is close enough.
- Drop the JPG into the converter.
- Turn on "Make a background color transparent" and pick the colour. White is one click.
- Start the tolerance low and raise it slowly while you watch the checkerboard preview.
- Stop as soon as the background is gone. Going further starts eating the subject.
- Download the PNG.
On a product shot against a seamless white sweep, or a scan with a white page around it, this takes a few seconds and the file never leaves your computer. But it only understands colour, and that's where it can go wrong.
My test: where the colour method fails
I ran the converter's colour method on a product photo of a red running shoe. The shoe stands on a light concrete floor in front of a darker grey wall, a very common studio setup. I picked the wall colour (RGB 108, 108, 108) and tried three tolerance settings. Here are the results on a dark background, so you can see what went transparent.
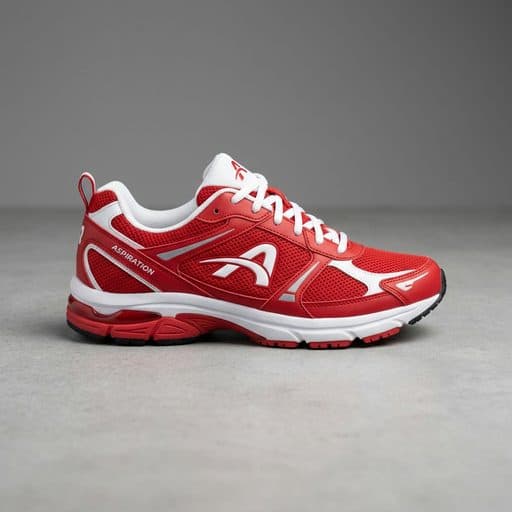
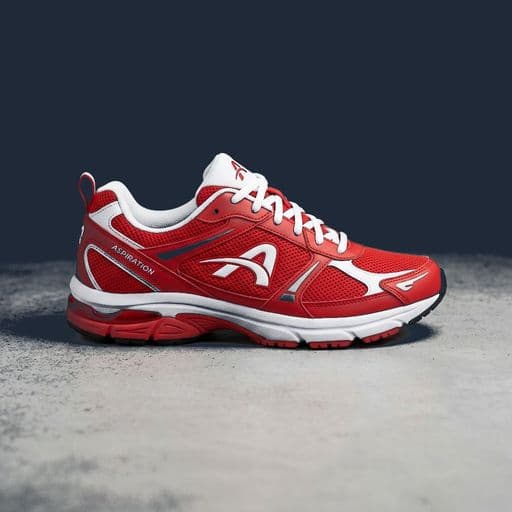
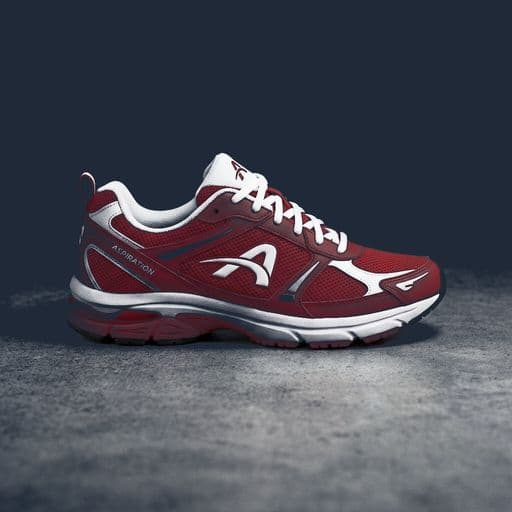
At 10 and 20 the wall vanished completely, but the floor didn't move at all. It's a much lighter grey than the wall, so the tool doesn't see it as the same colour. Worse, the silver stripes along the side of the shoe are nearly the same grey as the wall, so they went transparent with it. At 30 the floor started to disappear in blotches, and the whole shoe faded to a dull maroon because its darker reds were now inside the tolerance too.
There was no setting that worked. That isn't a fault of this converter. It's how every colour-based remover behaves, including the magic wand in photo editors. A photo with two background colours, a shadow and parts of the subject that match the background needs a tool that understands what a shoe is.
Method 2: AI background removal (any background)
The background remover doesn't look at colours. A model trained to spot the main subject of a photo finds it and cuts around it, so the floor, the wall and the shadow all go, and the grey stripes on the shoe stay because they're part of the shoe. It always gives you a PNG, so there's no separate conversion step.
The trade-off is that the photo goes to our server for processing, where it's deleted shortly after. If that matters for a particular image, try the colour method first.
Which one to use
| Your JPG | Use | Why |
|---|---|---|
| Product on pure white | JPG to PNG with white removed | One colour, nothing else to cut. Instant and private. |
| Logo on white | Logo background remover | Keeps white text inside the logo, trims and resizes. |
| Product with a shadow or floor | Background remover | Two background tones and a shadow, like my shoe test. |
| Person, pet, or anything outdoors | Background remover | Hair and busy backgrounds can't be split by colour. |
| Screenshot or scan with a solid fill | JPG to PNG with that colour removed | Flat colour, same as a white product shot. |
How to check that a PNG is really transparent
Image viewers often show transparency as white, which makes a transparent PNG look exactly like one with a white background. Two quick checks:
- Look at the preview in the tool. A grey and white checkerboard behind the subject means those areas are transparent.
- Drop the PNG onto something dark, like a dark slide in PowerPoint or Google Slides. Leftover white shows up straight away, especially as a thin light outline around the edges.
One more thing to watch: if you save the result as a JPG again at any point, the transparency is gone and the background turns white or black. Keep it as PNG, or as WebP if a website asks for smaller files.


